The One Click Post-Purchase
Last updated on September 22, 2026
💡 Looking for the Thank You Upsells? If you are looking for another type of post-purchase upsell that shows up as part of the Thank You page, you can go to this article: Enabling Thank You Page Upsells
With this new upsell offer, customers can effortlessly add products to their orders after checkout and unlock exclusive discounts.
Seamlessly integrated with your Shopify store’s Checkout system, this feature empowers customers to enhance their purchases with complementary products or upgrades while enjoying irresistible savings. This not only incentivizes additional purchases but also cultivates a sense of value and convenience for customers, fostering long-term loyalty and driving revenue growth for your business.
💡 Got a question about our Upsell Offers? We have a list of frequently asked questions about our Upsell Offers that you can check here: Upsell Builder FAQs
Before you begin
Since this feature is integrated into the Shopify Checkout process, the Vitals app should be designated first as the store’s official app for the Post-Purchase page.
This can be enabled by going to your Shopify admin > Settings > Checkout, and then scrolling down to the Post-Purchase page section:
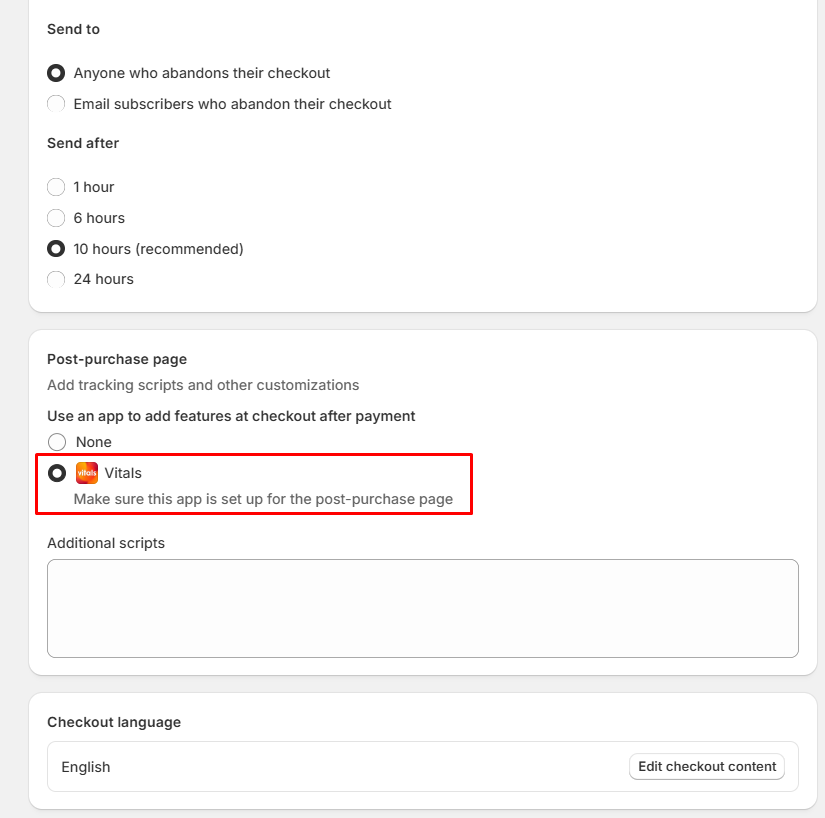
Once you select the Vitals app here and save your changes, it should be good, and you can start creating your post-purchase offers in the Vitals app.
Where to find this upsell offer
Open the Upsell Builder app and start a new offer by clicking the Create Offer button. The Choose your offer type page opens with a tab for each type of offer — pick the One Click Post-Purchase tab:
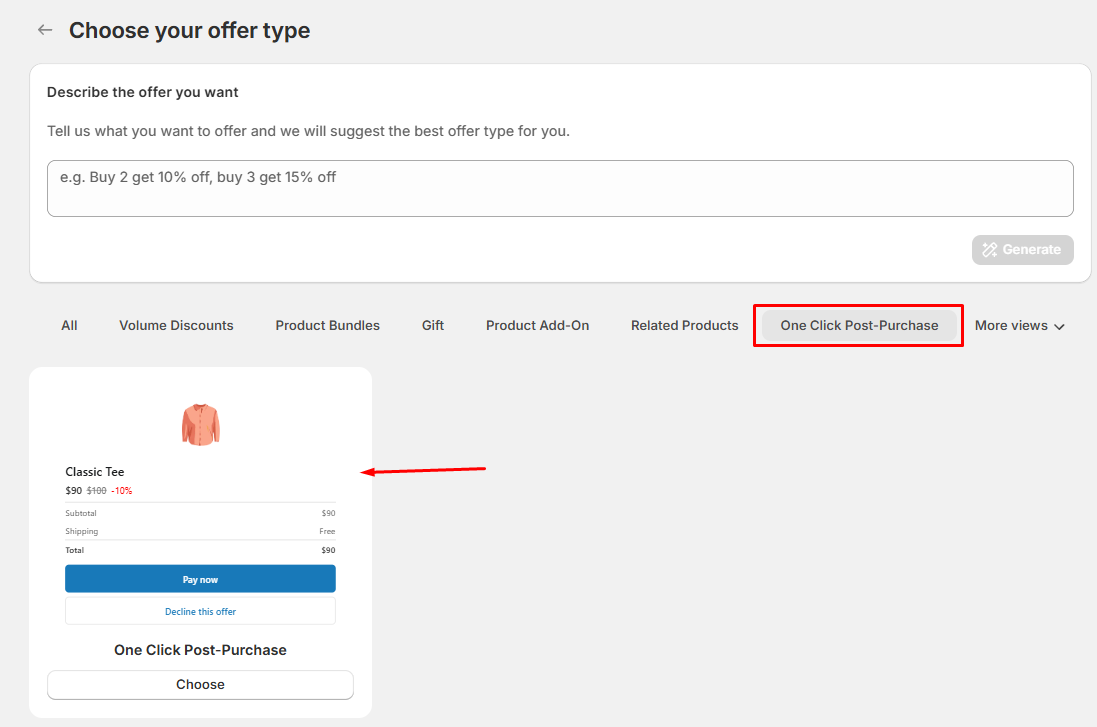
That tab shows a single One Click Post-Purchase card. Click Choose on it to open the offer editor.
One Click Post-Purchase Upsell Settings
The offer editor is a single page. Work down it from top to bottom and save when you are happy — there are no steps to finish in order, and nothing goes live until you save. A preview sits beside the settings and updates as you type.
The cards, in the order they appear: Upsell Type, Internal name, Applies to, Offer product, Discount, Schedule and Widget.
Upsell Type
The first card asks which surface the offer runs on. Post Purchase Upsell is the only choice available today — Thank You Page Upsell and Checkout Upsell are both marked Soon and cannot be selected yet, on any plan. Your selection here is not saved, so the card always opens on Post Purchase Upsell.
Internal name
Name the offer something you will recognise in your offers list. Customers never see this name.
Setting Vitals as your post-purchase app
If your store has not been set up yet, a warning card appears here headed Set Vitals as your Post-Purchase upsell app. It lists the three steps and gives you a Go to Shopify settings button that takes you straight there. The card disappears on its own once the setting is saved in Shopify.
Applies to
This card decides which orders see the offer. Pick a Trigger:
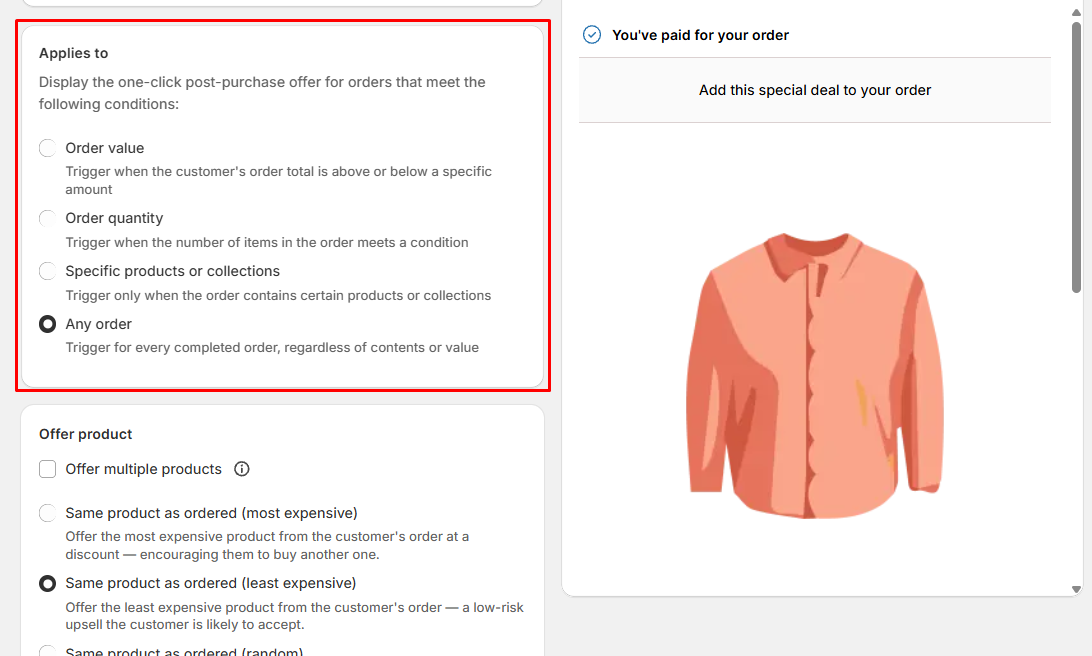
There are four options:
- Any order — the offer appears on every completed order, whatever it contains or is worth.
- Order quantity — the offer appears only when the number of items in the order is greater than, less than or equal to a value you set:
- Specific products or collections — the offer appears only when the order contains products or collections you choose.
- Order value — the offer appears only when the order total is above or below an amount you set, in your store's default currency.
Below the triggers is the Offer product card.
Offer product
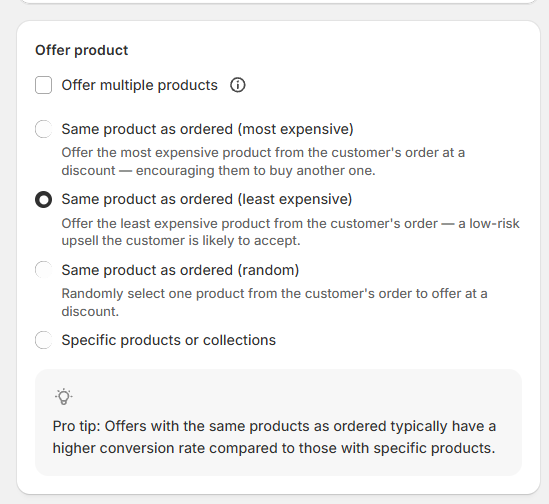
This card decides what the post-purchase page shows. By default an offer shows one product, and you pick it with these options:
- Same product as ordered (least expensive) — offers the cheapest item from the customer's order. A low-risk upsell they are likely to accept.
- Same product as ordered (most expensive) — offers the priciest item from their order, encouraging them to buy another.
- Same product as ordered (random) — picks one item from their order at random.
- Specific products or collections — offers a product or collection you choose yourself.
If you pick a collection, or more than one product, only one of them is shown to the customer and the editor reminds you so. To show several products, use Offer multiple products below.
Offering several products
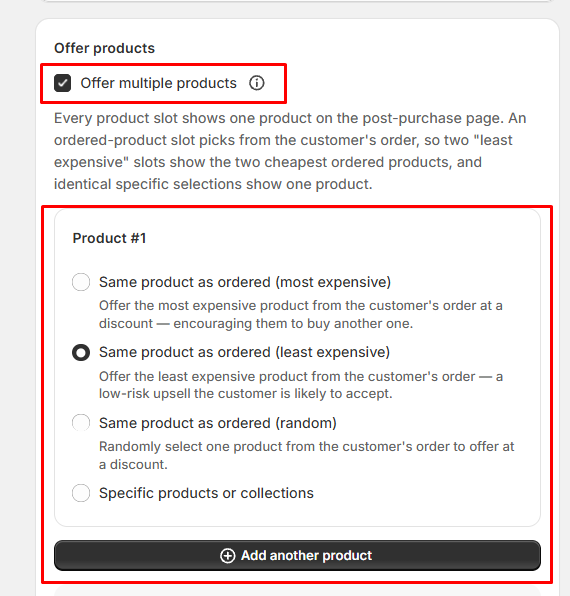
One offer can show up to 5 products on the same page. The customer ticks any mix of them and pays for the whole selection in a single click.
Tick Offer multiple products in the Offer product card. A Product #1 card appears for the product you already chose, and Add another product adds more, up to five. Each card has the same picker as a single-product offer, so you can mix items from the customer's order with specific products of your own, and the delete icon on a card removes that product.
Each card fills one place on the page. Two "same product as ordered" cards show two different items from the order — two least expensive cards show the two cheapest things they bought. If two cards point at the same specific product, it appears once.
Preselect every product decides how the page opens. Leave it ticked and everything starts selected, so the customer only unticks what they don't want; untick it and they choose what to add. It appears once the offer has more than one product, and it is ticked by default.
Products that are out of stock when the offer appears are skipped, so customers may see fewer than you set up.
Existing offers are untouched. Offer multiple products is off until you turn it on, so offers you already have keep showing the single product you set up. Turning it off again returns the offer to the first product in the list.
Discount
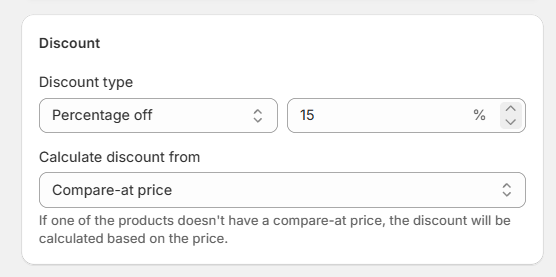
Discount type offers four choices: No discount, Percentage off, Amount off and Fixed price. Picking No discount hides the value field — use it when you want to recommend a product without changing its price.
Your discount applies to every product on the page. Percentage off scales with each product's price, while Amount off and Fixed price are the same figure for every product — so an amount off larger than a product's price makes it free, and a fixed price above it leaves that product at full price. The editor warns you about this once the offer has more than one product.
Calculate discount from decides which price the offer strikes through: Price or Compare-at price. New offers use Compare-at price. It only changes what customers see the deal compared against, never the amount they are charged.
Schedule
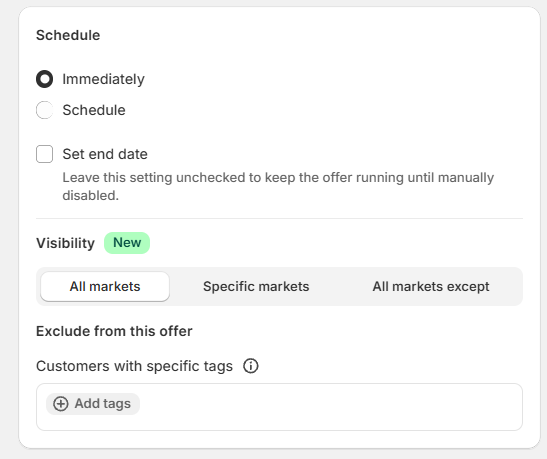
The card opens on Immediately. Switch it to Schedule to pick a Timezone, a Start date and a Start time. Tick Set end date to add an End date and End time — leave it unticked and the offer runs until you turn it off.
Below the dates, Visibility limits the offer by market: All markets, Specific markets or All markets except. If Vitals is missing the Shopify permission it needs to read your markets, a banner headed Show this offer in specific markets explains that the store owner has to grant it by opening Vitals from the Shopify admin and accepting the updated permissions.
Exclude from this offer holds a Customers with specific tags picker — customers carrying any of those Shopify tags will not see the offer. It only applies to customers who are logged in; a guest checkout always sees it.
Widget
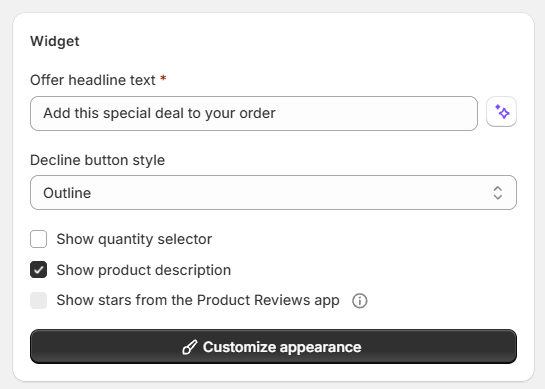
The Widget card controls how the offer looks:
- Offer headline text — the line above the offer. New offers start with "Add this special deal to your order".
- Decline button style — Outline or Text only.
- Show quantity selector — off by default. With it on, each product on the page gets its own quantity field and the total updates as the customer changes it.
- Show product description — on by default.
- Show stars from the Product Reviews app — off by default, and only available while the Product Reviews app is active.
Customize appearance at the bottom of the card opens a fullscreen editor with the same controls beside a larger preview, plus a desktop/mobile switch and Undo changes. The headline stays on the main page — the fullscreen editor is for styling only.
Saving and going live
There is no separate review step — everything lives on the one page. When you are happy with it, set the offer to Active and click Save in the bar at the top.
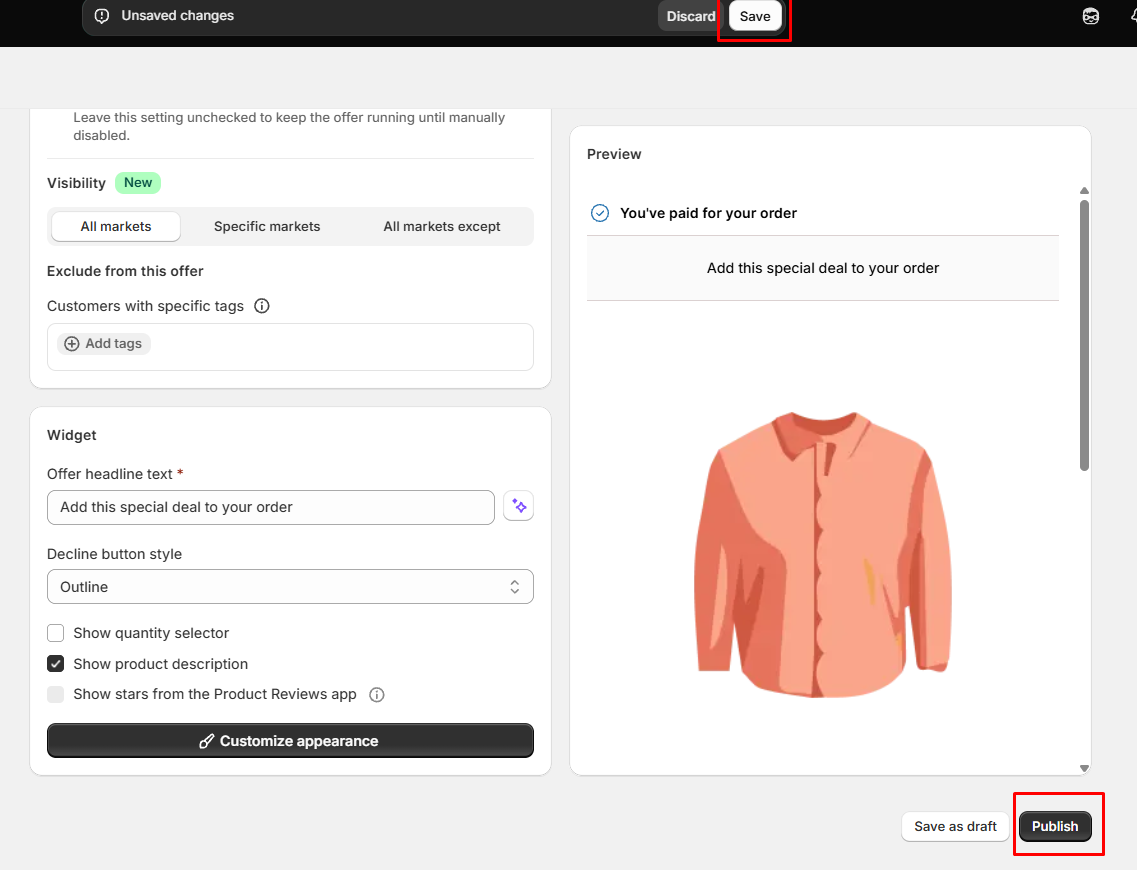
Once saved, customers whose order matches your trigger will start seeing the offer.
To duplicate an offer, translate it or check how it is performing, use More actions at the top of the offer page — it holds Duplicate, Translate, Suggest feature and Analytics. Duplicate is greyed out while you have unsaved changes, and Translate only appears if your store has a language other than English.
💡 Anything the customer accepts is added to the order they just placed. When they accept your post-purchase offer, the completed order is updated with every product they selected, each with its discount applied — no second order and no second payment.
Frequently Asked Questions (FAQs)
Where is the One Click Post-Purchase Upsell Offer going to appear?
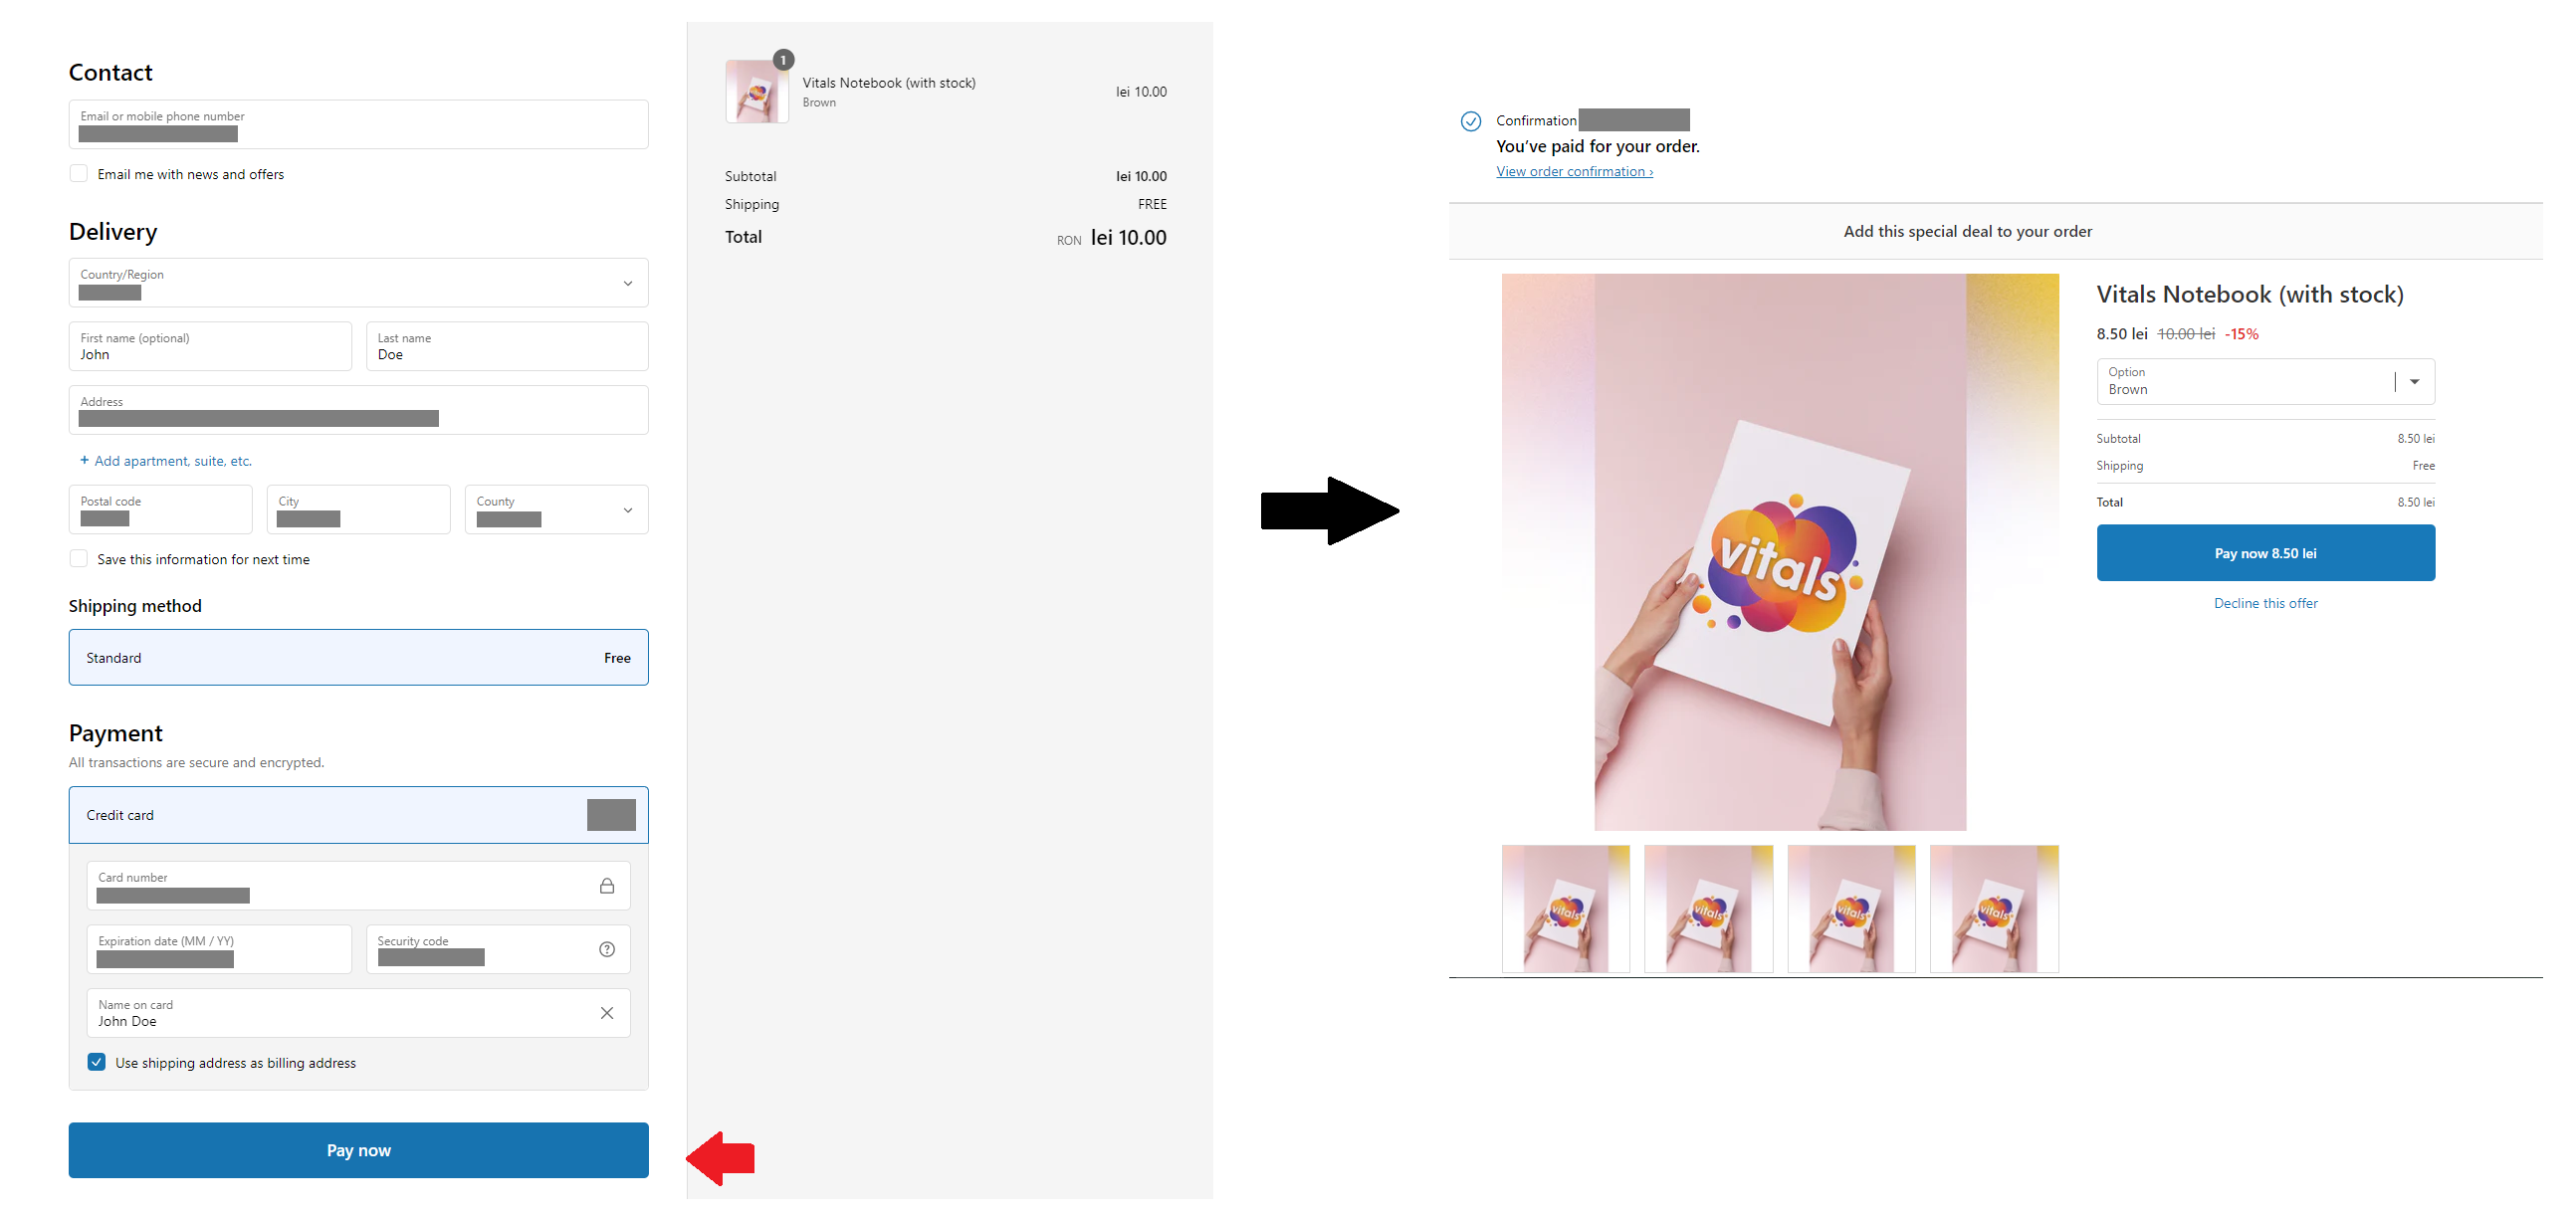
The One Click Post-Purchase upsell offer would automatically appear after the customer completes the order, specifically after the "Pay Now" button is pressed:
I enabled my store to sell in multiple currencies. Will this feature work with this?
Unfortunately, due to Shopify limitations, the One Click Post-Purchase app is not compatible with stores with multiple currencies. This limitation is also listed on Shopify's technical documentation about this feature here.
For a full list of the limitations, you may refer to our article here: One Click Post-Purchase Limitations